# Deployment
This section handles the process of bringing your application from source code to any server.
# Guides
Guides for specific hosting platforms with step-by-step instruction for your setup.
- Deploy on Heroku
# Build process
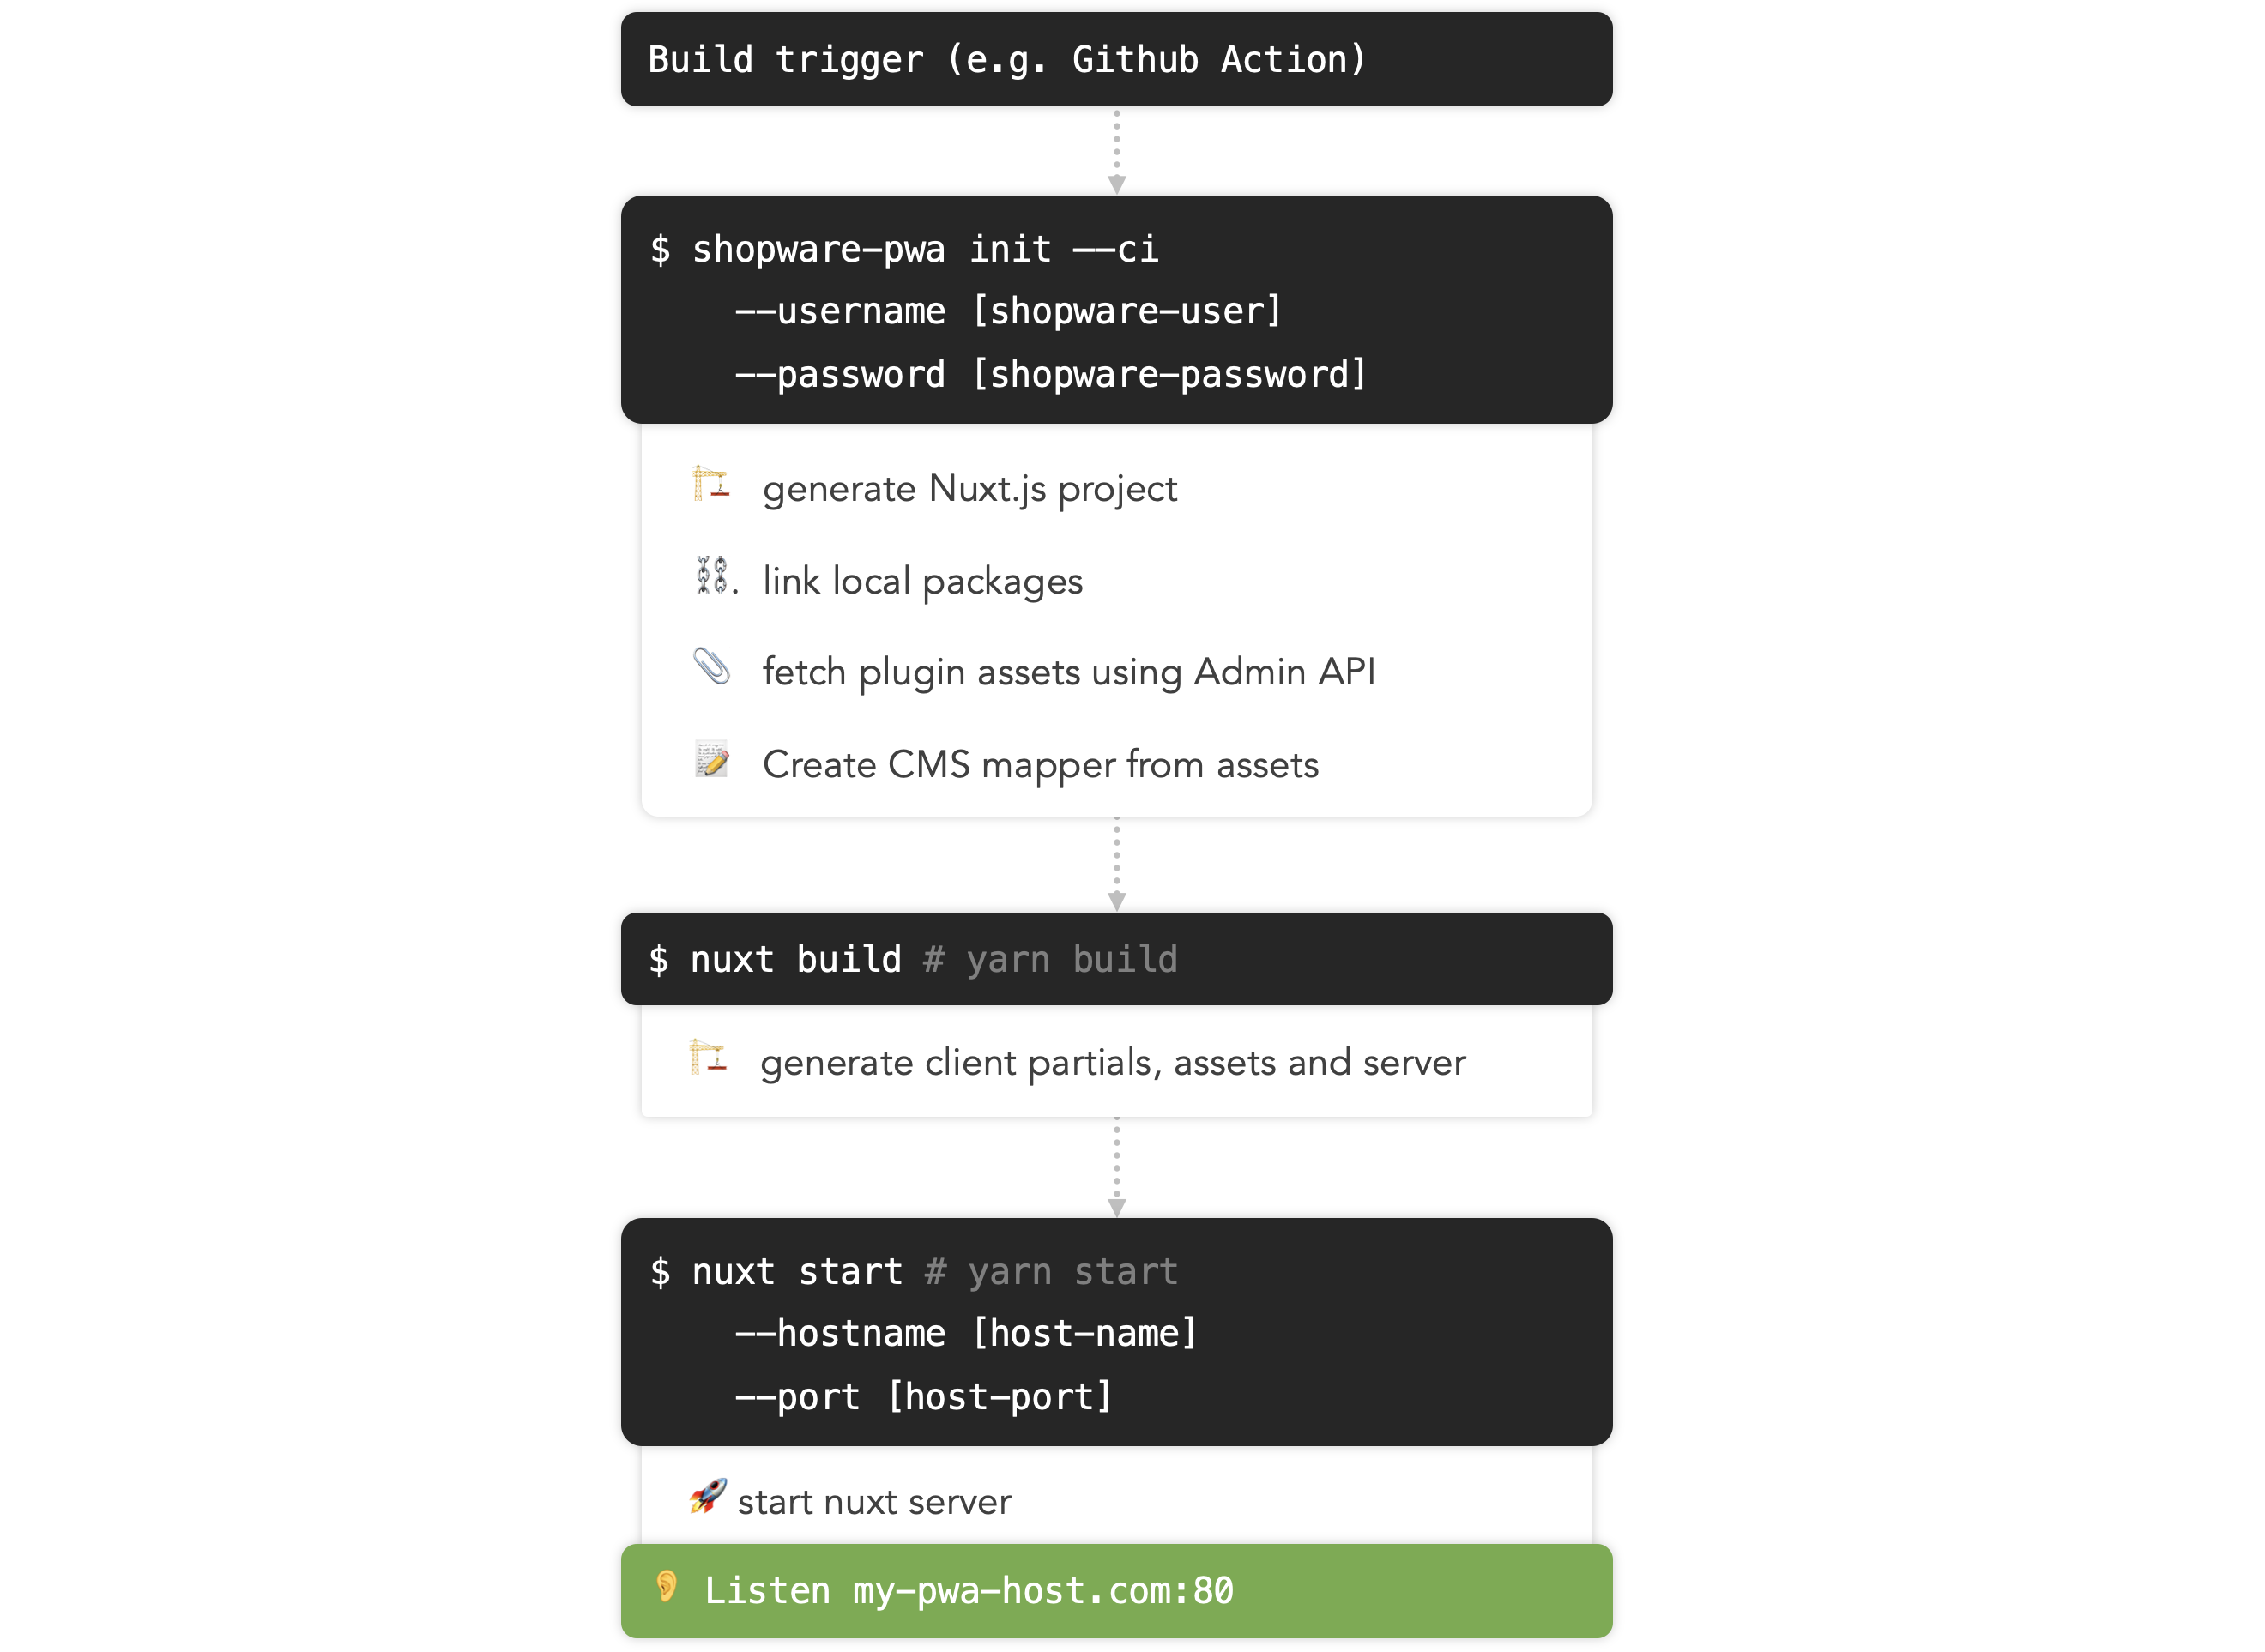
In order to build your custom deployment, it is more than helpful to understand the build process. The following diagram illustrates the process.

# Build trigger
Depending on your CI setup you will usually have a trigger that initiates a build, e.g. pushing to a certain branch. You can obviously also trigger the build automatically.
# Initialize the project
$ shopware-pwa init
    --ci
    --username [shopware-user]
    --password [shopware-password]
Let's take this one apart. We set the --ci parameter to deactivate the interactive mode where the CLI would ask us for the Shopware credentials. Instead, we just provide them using the --username and --password credentials. These credentials are used to request the currently installed plugins in your Shopware instance.
During CI, you're obviously not creating a new Nuxt project as the diagram above states. Instead, the CLI skips the initial setup, when there is a nuxt.config.js file in your project root.
All artifacts of that step are placed in the .shopware-pwa directory.
💡 Requests to Shopware during build process
If you want to restrict requests by the build server for your API, make sure to exclude these routes:
- Obtain Admin API authentication token
/api/oauth/token - Fetch plugin assets
/api/_action/pwa/dump-bundles
Step 2. will return two file links, one will be a .zip file containing all the resources from your plugins, the other one will be a .json file containing your plugins configuration (as made in the admin interface). Make sure, that these files are accessible by your build server.
# Build the project
$ yarn build
This command will let Nuxt.js generate the minified sources and assets of your application, such as
- Client application
- Application Server for SSR
- Code partials for pre-fetching
and place it in the .nuxt directory.
# Start the server
$ yarn start
Will start the application server. You can specify a specific host and port using the --hostname and --port parameters or using the environment variablbes HOST and PORT respectively.
Instead you can also set them in your nuxt.config.js
export default {
  server: {
    port: 8000,
    host: "0.0.0.0",
  },
  /* more config */
};